
As bespoke jewellers the heritage of our craft is extremely important to us, but we don’t let that stop us from embracing the latest innovations—as long as they allow us to offer our customers a better service. As we wrote in a previous blog post, jewellery making dates back millennia, with many age old manufacturing techniques still being used today.
There have been two significant changes to the way jewellers work in the 21st Century. The first is the use of CAD (Computer Aided Design) and the second is 3D printing. Both of these innovations allow our jewellers to offer more creative designs without increasing cost, as well as making it easier for our customers to have more input during the design process. So incorporating them into the journey your jewellery takes with us was a no-brainer.
Step One: Consultation and design brief
The first step in the design process is a consultation between you, the customer, and one of our jewellers. This may be over the phone or by email, but more often than not we hold one-to-one consultations in our Leeds showroom. This gives you the chance to chat through exactly what you want, it also allows our jewellers to show you examples of rings or jewellery we hold in our showroom, whilst giving expert advise on settings, gemstones, stone size and clarity, precious metals and a plethora of other options. Our jewellers may also make sketches of your jewellery at this stage, before passing everything on to our CAD designer.
Step Two: CAD Design
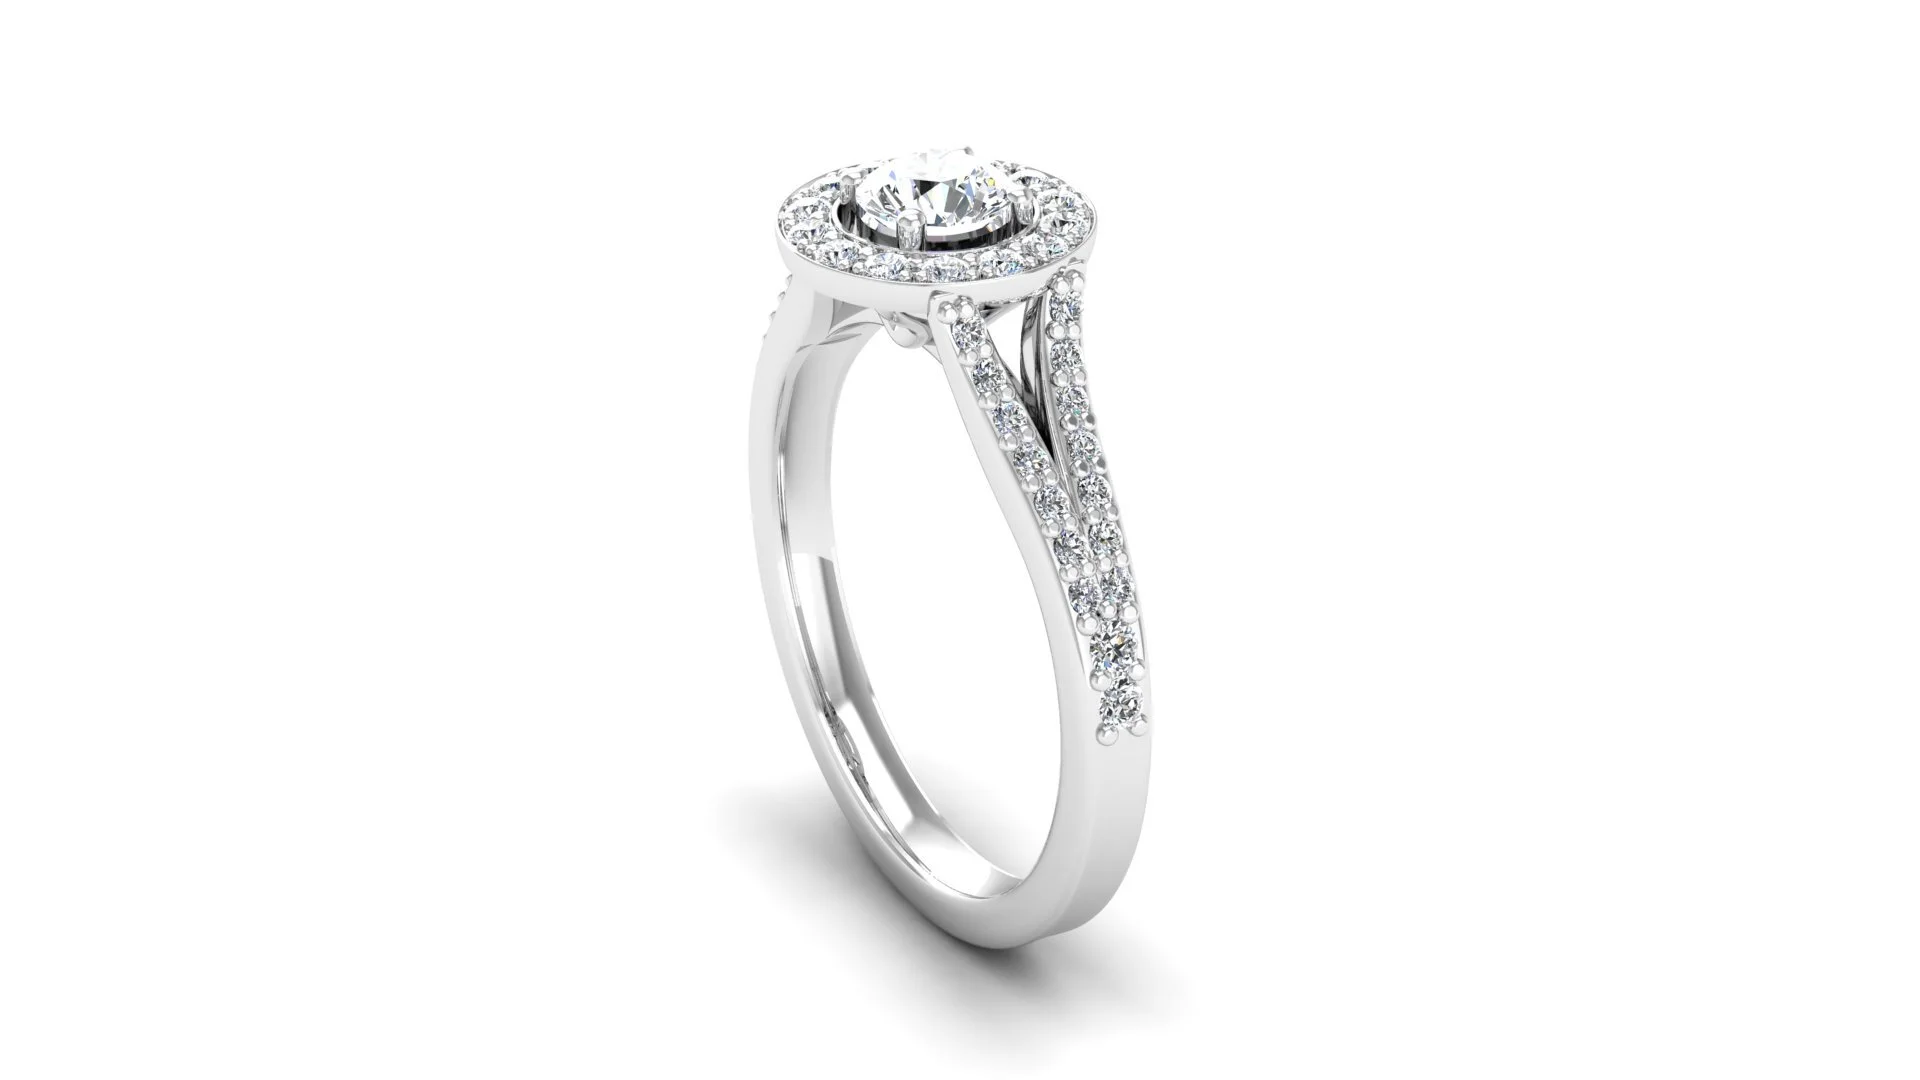
CAD 3D Render
During this stage of your jewellery’s journey our CAD designer creates a 3D render of your jewellery in a piece of computer software called Matrix. This render allows both you and our jewellers to view the jewellery and make any amendments to the design. This is a great time for you to give feedback and ask any questions you may have about your jewellery, after all, this is a bespoke service so your input is as important as our jeweller’s. Once everyone is happy, the CAD render is sent over to our 3D printer to be printed in wax resin.

CAD Design

Step Three: 3D Print
A wax resin model of your jewellery is now 3D printed in our Leeds workshop using our Formlabs 3D printer. This model is then sent off to one of the casting companies we use to be cast in the precious metal of your choice. A few days later our Leeds based workshop receive the precious metal cast of your jewellery and it’s then time to set and finish it.
Step Four: Set, Finish and Collection
During this stage, gemstones are set into your jewellery, the metal is polished and any finishing touches are completed. Finally, we quality check your ring, photograph it for our archive and package it for you to collect. It is then ready to be collected in our Leeds showroom or posted to anywhere in the world for you.
